
I came with my app development to a stage where I’m about to inform user about various things happening behind the scenes. This means that I have to present messages like: estimating current location, fetching weather forecast, etc. somewhere in the user interface. And this is the moment when you have to think about the future and make steps required to localize your application. Trust me, I know the pain of searching for every silly unlocalized string and replacing it with a newly created string resource. It’s donkey work and it’s better to make proper arrangements in advance.
It turned out that localizing iOS application is not as straightforward as I assumed :) It took me two evenings to put everything together. Today I’m going to show you a step by step instruction for localizing iOS application with Swift 3.
Add support for a new language
- Select your project in the project navigator.
- Go to Info tab.
- Click plus button under Localizations section and choose your new language from the drop down list.
- A popup will appear with list of your .storyboard files. Check the ones you are going to translate and click finish.

Add Localizable.strings file to your project
Localizable.string is a „magic” file, where you are going to store all your strings as key – value pairs. Every language has it’s own file stored in proper subdirectory, eg. pl.lproj/Localizable.strings for my polish translations.
- Click cmd + N (Add new file..) and choose Strings File template:
- Name the file: Localizable.strings. Exactly like this, otherwise it won’t work :) Pay attention to the case!

- Select the file in project explorer, go to Files Inspector tab on the right and check your languages

This will create your language specific resource files and place it in proper directories:
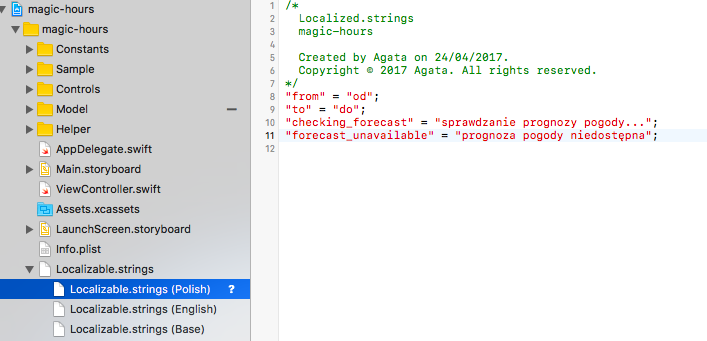
As you can see, single resource file consists of entries:
„key” = „value”;
Semicolon is important. Don’t forget it ;) So how does it work? You create a unique key for your message, alert, header, whatever and the associated value for holding language-specific string representation of what you want to say :) In your code you’ll be dealing with resource keys and the proper localized value will be fetched for you based on device’s current language. Hopefully :)
Add Copy Files to Build Phases
This is something that I missed in online tutorials and that I eventually did after following one suggestion on stackoverflow. Ground rule is: if something is not working as expected: clean, quit Xcode and rebuild your app. Sometimes it’s enough :) If your code gives you resource keys instead of values (this is what I struggled with yesterday), it means that Localizable.strings file cannot be found. So this step is about ensuring that resource files are copied to the output.
- Select your project in the project navigator, select TARGETS and Build Phases tab.
- Click plus and choose New Copy Files Phase

- Under Copy Files section click plus button and select your Localizable.strings file.
- Set Destination combo to Resources

Making all this more developer-friendly
I haven’t told you yet how to access a single resource entry from the swift code. Well, this is how we do it:
let value = NSLocalizedString(key, bundle: Bundle(for: BundleToken.self), comment: "");
Not very sophisticated approach.. It’s easy to make a typo and access keys that don’t even exist. Luckily, there are good people out there with plenty of free time, that make iOS development a little more painless.
Install homebrew
If you haven’t already, install homebrew. As is stated on their website: Homebrew installs the stuff you need that Apple didn’t. We are going to use this tool to install another tools that will help us out with the localization ;)
To install homebrew:
- Press cmd + space,
- Type terminal and hit enter,
- Paste following command in terminal window and hit enter:
/usr/bin/ruby -e "$(curl -fsSL https://raw.githubusercontent.com/Homebrew/install/master/install)
Installing SwiftGen and integrating it with Xcode
SwiftGen is an open source code generator (among others) for assets, storyboards and Localizable.strings. We are going to integrate it with Xcode. SwiftGen will autogenerate a swift file for accessing translation in a more convenient way.
To install SwiftGen we need homebrew:
- Press cmd + space,
- Type terminal and hit enter,
- Paste following command in terminal window and hit enter:
brew update
brew install swiftgen
To integrate SwiftGen with Xcode:
- Select your project in the project navigator, select TARGETS and Build Phases tab.
- Click plus and choose New Run Script Phase

Paste following lines in script field:

swiftgen strings -t dot-syntax-swift3 "$PROJECT_DIR/Base.lproj/Localizable.strings" --output "$PROJECT_DIR/Constants/Localized.swift";
This command takes input from base localized file and auto generates code for accessing resources in a more friendly manner.
- Create Constants directory in your project folder,
- Build your project. This should generate Localized.swift file.
- After first build add the newly created file to your project: File -> Add files to %your_project_name%
We’re done. Created file should look something like this:

And now I’m able to set proper message with this line of code:
weatherSummary = L10n.checkingForecast;
with intellisense support.

Cool :)
Weather forecast is localized by itself, as there are many languages supported by the api call, but I have localized the from – to temperature part.
This is current app screen for polish lang:


